Stretching Pixels: A Glitchy Post-Processing Pass in 25 Lines of GLSL
How a single clamp, a pinch of fract(sin(x)) and a floor turn a clean render into a jittery, VHS-flavored smear.
- GLSL
- Shaders
- Post-processing
- Three.js
- React Three Fiber
Some shader effects take a whole weekend and a pile of math papers. This one isn’t that. The stretch pass from kinect-stretch (opens in a new tab) is barely 25 lines of GLSL, yet it gives a Kinect point cloud that satisfying “the tape is chewing itself” feel: horizontal bands of the image suddenly smear out towards the edges, twitch and settle, again and again.
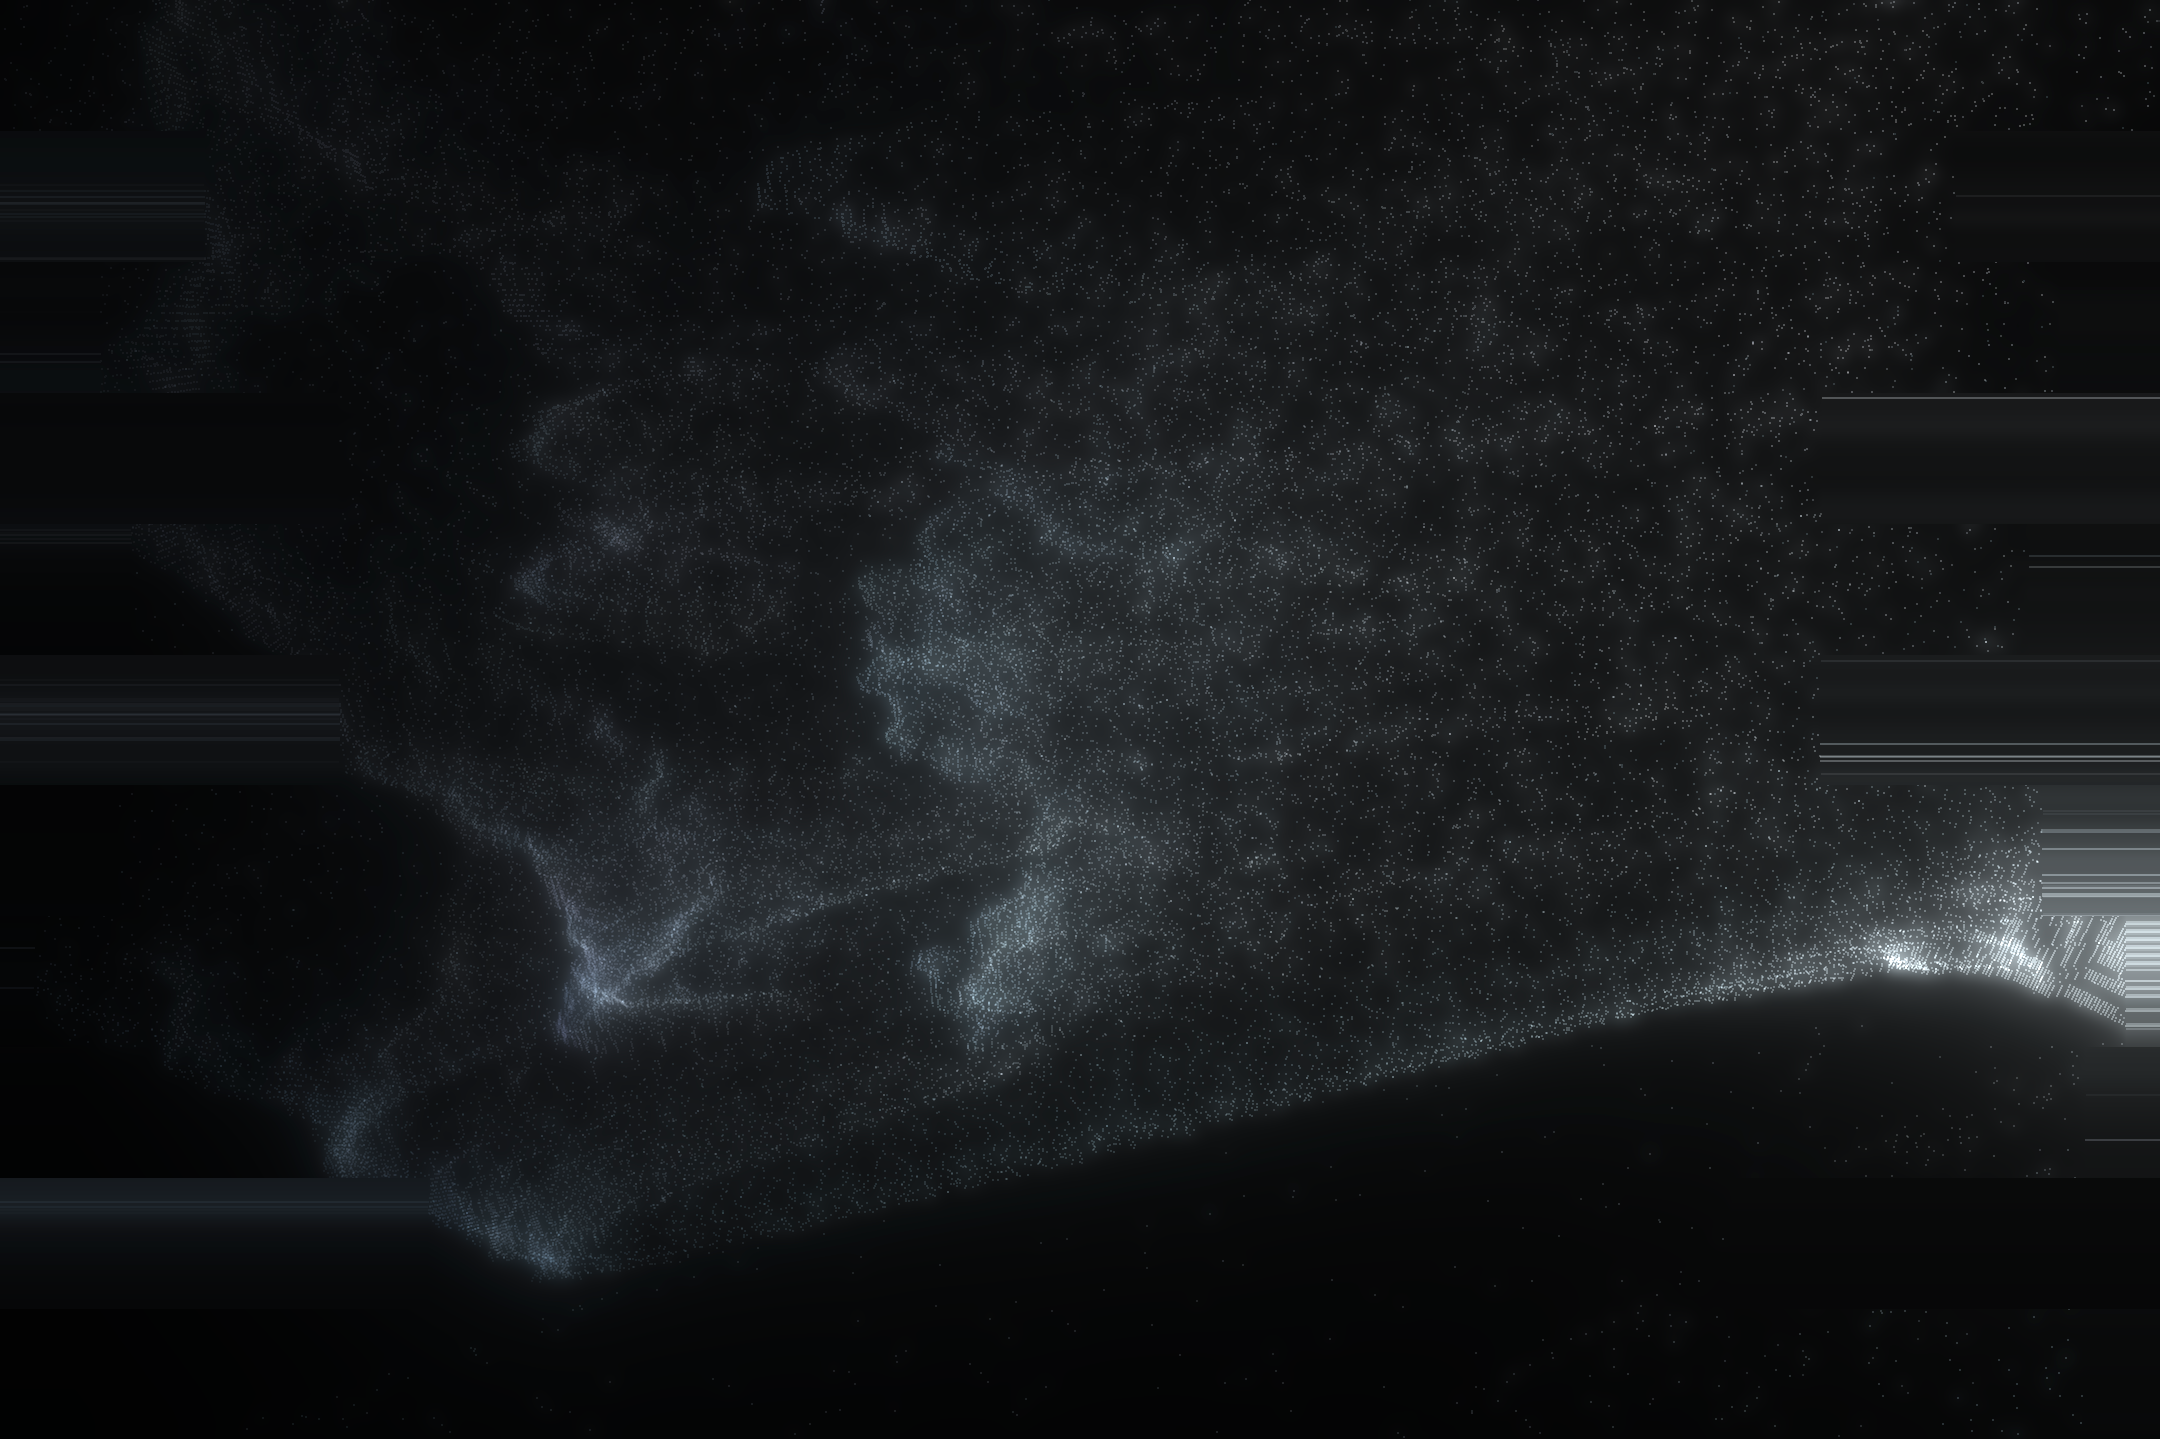
A frame from the scene. Notice how some horizontal bands are pulled towards the left and right edges.
In this article we’ll take it apart one line at a time. Every step comes with a small playground so you can poke at it instead of taking my word for it. By the end you should know exactly why it works, and how to bend it into your own variations.
Where the pass lives
The scene is rendered through three.js’s EffectComposer. Think of it as a relay race: each pass renders into a texture and hands it to the next one. The stretch pass runs last, after the bloom, so the glow gets smeared together with everything else.
- RenderPass
- UnrealBloomPass
- StretchPass
- screen
tDiffuse.In React Three Fiber, the composer is just JSX:
<effectComposer ref={composerRef} args={[gl]}>
  <renderPass attach='passes-0' args={[scene, camera]} />
  <unrealBloomPass
    attach='passes-1'
    args={[size, strength, radius, threshold]}
  />
  <StretchPass attach='passes-2' isStatic={isStatic} />
</effectComposer>
StretchPass is based on three.js’s ShaderPass (opens in a new tab), so it draws a single full-screen quad. Its fragment shader runs once per pixel, and it receives the previous pass’s output as a texture uniform called tDiffuse. So our job boils down to one question, asked for every pixel on screen: which pixel of tDiffuse should I show here?
The whole shader
Here it is in full. Don’t worry if it looks cryptic: we’ll go through it piece by piece.
uniform sampler2D tDiffuse;
uniform float amplitude;
uniform float seed;
uniform float steps;

varying vec2 vUv;

float hash(float n) {
  return fract(sin(n) * 43758.5453123);
}

float discreteNoise(float x) {
  float step = floor(x * steps);
  return hash(step + seed);
}

void main() {
  vec2 uv = vUv;

  float noise = discreteNoise(uv.y) * amplitude;
  uv.x = clamp(uv.x, noise, 1.0 - noise);

  gl_FragColor = texture2D(tDiffuse, uv);
}
Three ideas are hiding in there:
- Clamp the horizontal texture coordinate to make the edges smear.
- Hash a number into something that looks random.
- Floor the vertical coordinate so the randomness comes in chunky bands.
Let’s start with the one that does the actual stretching.
Step 1: Stretching with clamp
vUv is the pixel’s position on screen, normalized to the 0.0 → 1.0 range on both axes. Passed straight to texture2D, it simply copies the input. The whole trick is to lie about uv.x before sampling.
clamp(x, minVal, maxVal) (opens in a new tab) constrains a value to a range. It’s equivalent to min(max(x, minVal), maxVal). Anything below the range gets pushed up to minVal, anything above gets pulled down to maxVal, and anything in between passes through untouched.
Now picture a single row of pixels, and call our clamp margin noise. Every pixel whose uv.x is less than noise samples the same column: the one exactly at noise. That one column of color gets repeated all the way to the left edge. The same thing happens, mirrored, on the right. The middle of the row stays as it was.
Drag the slider to see it on a row of 32 “pixels”:
At 0.0 nothing happens. At 0.5 the range collapses to a single point and the entire row becomes one color, the one from the dead center. That’s why the project caps amplitude at 0.5: going beyond that would make minVal larger than maxVal, and the GLSL spec says the result is undefined in that case.
Key idea
No new pixels are invented. We never compute a color. We only change where we read from. Most “distortion” shaders (ripples, glitches, lens warps) are the same idea: move the UV, then sample.
If every row used the same noise, we’d get two static bars at the sides. Boring. We want each band of rows to pick its own margin, and to pick it randomly.
Step 2: Randomness without Math.random()
GLSL has no random number generator. A shader is a pure function: same inputs, same output, for millions of pixels in parallel. So instead of generating randomness, we fake it with a function whose output looks chaotic enough. This is the classic one-liner you’ll find all over The Book of Shaders (opens in a new tab) and Shadertoy:
float hash(float n) {
  return fract(sin(n) * 43758.5453123);
}
It reads inside out:
sin(n)(opens in a new tab) gives a smooth wave between-1.0and1.0. Nothing random about it yet.- Multiplying by a big, awkward number like
43758.5453stretches that wave vertically, so a tiny step innnow means a huge jump in the result. fract(x)(opens in a new tab) keeps only the fractional part,x - floor(x). It folds that giant wave back into0.0 → 1.0, over and over, thousands of times per period.
The result is a value in [0, 1) that jumps unpredictably from one input to the next. The easiest way to feel it is to crank the multiplier yourself:
fract(sin(x) * k). With small k you can still see the sine. Push it to the right and the wave shatters into noise.It isn’t a good random number generator by any statistical standard. But for visuals, “looks random to a human eye” is all we need, and it costs just a couple of instructions.
Step 3: Chunky bands with floor
If we fed uv.y directly into hash, every single row of pixels would get a different margin. That produces fine, hairy static rather than bold bands. The discreteNoise function fixes this:
float discreteNoise(float x) {
  float step = floor(x * steps);
  return hash(step + seed);
}
floor(x) (opens in a new tab) rounds down to the nearest whole number. Multiply uv.y by steps first, and the screen is chopped into horizontal slices. With steps = 4:
uv.y  0.00 … 0.24  →  floor(uv.y * 4) = 0
uv.y  0.25 … 0.49  →  floor(uv.y * 4) = 1
uv.y  0.50 … 0.74  →  floor(uv.y * 4) = 2
uv.y  0.75 … 0.99  →  floor(uv.y * 4) = 3
All the rows inside a slice share the same integer, so they share the same hash, so they share the same margin. Each slice stretches as one solid band.
The seed uniform is the reroll button. Adding it shifts which part of the sine wave each band lands on, so a new seed gives a whole new arrangement of bands without touching anything else.
Naming quirk
step is also the name of a built-in GLSL function. Declaring a local variable with that name is legal (it just hides the built-in inside this function), but if you ever want to call step() in there, you’ll need to rename it.
Putting it all together
Back in main(), the hash lands in 0 → 1, and amplitude scales it down to the actual margin. With amplitude = 0.3 no band can be clamped by more than 30% from each side.
Here’s the real shader running on a test image. Switch to Mask to see which areas are being smeared, and turn on Shuffle to get the same 400 ms twitching the project uses:
Try a few things while you’re here:
- Set
stepsto1. The whole frame is a single band, so it squeezes in from both sides at once. - Push
stepsto100. The bands become thin, and it starts looking like a torn-up CRT signal. - Drag
seedslowly. The bands don’t slide smoothly, they jump. That’s the hash doing its job: nearby inputs, unrelated outputs.
Driving it from JavaScript
The shader alone is a still image. The motion comes from the React side, which rerolls all three uniforms on a timer:
useInterval(() => {
  if (isStatic) return;

  const stretchPass = stretchPassRef.current;
  if (!stretchPass) return;

  const {uniforms} = stretchPass;
  const {amplitudeMin, amplitudeMax, stepsMin, stepsMax} = stretch;
  uniforms.amplitude.value = randFloat(amplitudeMin, amplitudeMax);
  uniforms.seed.value = randFloat(0.0, 100000.0);
  uniforms.steps.value = randFloat(stepsMin, stepsMax);
}, 400);
A few choices here are worth pointing out:
- It’s on an interval, not in
useFrame. Rerolling at 60 fps would just be flicker. At 400 ms your eye catches each arrangement for a moment before it snaps to the next, which reads as a deliberate glitch rather than noise. - Everything is randomized within ranges.
amplitudelives between0.1and0.3,stepsbetween2and20. The ranges are exposed through Leva (opens in a new tab) on the/debug(opens in a new tab) page, which makes tuning the vibe very quick. - Setting a uniform is cheap. We mutate
uniforms.x.valuedirectly. No re-render, no shader recompile.
For screenshot tests there’s a static mode that skips the timer and pins everything to fixed values: the midpoint of each range and seed = 100.0. The same seed always gives the same bands, which is exactly what a visual regression test needs. More on that setup in Visual Regression Testing for Three.js Scenes.
A couple of gotchas
Huge seeds and sin precision
On the GPU, sin() is fast and approximate. With inputs in the tens of thousands (our seed goes up to 100000), different GPUs can return noticeably different values, so the exact band layout may differ between an M-series Mac and a phone. For a glitch effect it doesn’t matter at all. If you need the same pattern everywhere, keep the seed small or reach for an integer-based hash instead of the sin one.
Pass order changes the look
Putting the stretch after bloom means the glow gets smeared into long streaks, which is a big part of the look. Swap them and the bloom would blur the hard edges of the bands instead, making the whole thing softer and much less “digital”.
Taking it further
Once you see the effect as “clamp the UV with random margins per band”, variations come almost for free:
- Go vertical: swap the axes,
discreteNoise(uv.x)and clampuv.y, for dripping columns. - Stretch one side only: clamp with
clamp(uv.x, noise, 1.0)for a lopsided, wind-blown look. - Split the channels: sample red, green and blue with slightly different
amplitudevalues for a chromatic aberration fringe along the smear. - Animate in the shader: pass a
timeuniform and useseed + floor(time * 2.5)to get the same rhythm without any JavaScript timer. - Skip some bands: multiply the noise by
step(0.6, hash(...))so only some bands stretch at all, and the rest stay clean.
Takeaways
- Distortion is about where you read, not what you draw. Nudge the UV before
texture2Dand you get an effect. clampon a UV repeats the edge. Everything outside the range samples the boundary column, which reads as a stretch.fract(sin(x) * bigNumber)is “good enough” randomness for visuals, and it’s deterministic, so it’s easy to test.floor(x * steps)turns smooth into chunky. It’s the easiest way to get blocks, bands or pixelation out of any continuous input.- Timing is part of the effect. The same shader feels completely different rerolled every frame versus every 400 ms.
The full source, including the Kinect point cloud and the bloom setup, is at satelllte/kinect-stretch (opens in a new tab).
Resources
Projects:
- satelllte/kinect-stretch (opens in a new tab) — the scene from this article (live (opens in a new tab), debug (opens in a new tab))
Documentation:
- OpenGL reference:
clamp(opens in a new tab) - OpenGL reference:
sin(opens in a new tab) - OpenGL reference:
fract(opens in a new tab) - OpenGL reference:
floor(opens in a new tab) - The Book of Shaders: Random (opens in a new tab)
- Three.js: EffectComposer (opens in a new tab)
- React Three Fiber (opens in a new tab)
- Leva (opens in a new tab)